Showing posts with label Simply Camellias. Show all posts

Friday, August 3, 2018

Happy Power Poppy Friday~August 3rd!


Hello there and Happy Friday to you!  I hope all has been going well with you!  I have a quick little card to share with you for today's Power Poppy Friday inspiration.  I chose to use the Simply Camellias stamp set for my image and the Soothing Sympathy stamp set for my sentiment.


I started by stamping my image with Memento's Tuxedo Black ink on a die cut of rustic white card stock.  After coloring the image with Copics, I stamped the sentiment then stitched a strip of patterned paper down the left side.  Next, I added some shimmer with a Wink of Stella clear brush pen.  All that was left was to add a bit of sheer ribbon and adhere it to a card base.  The finished size of this card is 3 5/8" x 4 7/8".


So that is all for my card today but a couple of my Bloomie sisters, Kathy Jones and Cindy Lawrence, have some pretty amazing creations for your Friday inspiration so make sure you check them out...and leave a little blog love while you are there.  And hey....today the newest Power & Spark challenge is being introduced.  The amazingly talented and Cindy Lawrence is our hostess this month so make sure you check this out over on the Power Poppy blog!


Thank you so much for stopping by today and I hope to see you again soon....until then, take care! :)

~Katie

Copics used:  RV000, RV81, RV83, RV85, RV89, E000, E01, E42, E93, E97, Y15, G29, G40, G43, G46, YG91, BG0000, BG02, B000, B00.

Friday, January 19, 2018

Happy Power Poppy Friday~January 19th!


Hello there and welcome back for another Power Poppy Friday!  How have you been?  We have been getting some very c-o-l-d weather here...complete with snow....again!  I am loving seeing the snow, but the temperatures in the teens are getting a bit old....and the impact the weather has had on our camellias has not been good.  Most of the about-to-open blooms were lost on two of our camellias and we are waiting to see about the other two....keeping our fingers crossed.  So, I figured if I can't have the real blooms, I'll just color one up from Marcella's incredibly beautiful stamp set, Simply Camellias.  


I started by stamping my image with Memento's Tuxedo Black ink on to white card stock.  Next, I die cut the image  and then colored it up with Copics.  After that, I stitched some patterned paper along one side, then stamped a sentiment from the Prairie Cheer stamp set with Tsukineko's Versafine ink in Onyx Black.  Lastly, the image panel was adhered to a blue card stock base.  This finished card measures 3 1/4" x 4 3/4".


Don't you just love this darling little camellia bloom?  As always, Marcella's amazing details  make this a dream to color up.  I chose to color this bloom as a variegated variety....actually, I am on the look out for a good variegated camellia to join our others.  I am thinking if I could find one like this, we'd be set! ;)

So, that is all for my card today, but some of my Bloomie sisters have some lovely creations for your Friday inspiration, so make sure you check them out and leave a little blog love while you are there.  Make sure you also check out the latest goings on over on the Power Poppy blog.....lots of good stuff to see!  I am so glad you could stop by, and I hope to see you around her again soon.  Until then...take care!  And....stay warm! :)


Cindy Lawrence    
Julie Koerber 
Katie Sims <------You are here 
Stacy Morgan 


~Katie

Supplies used not listed above:  Paper-patterned paper from My Favorite Things' Plaid Patterns Merry & Bright 6x6 paper pack; Dies-My Favorite Things' Dienamics Cross Stitch Rectangles die set; Other-Wink of Stella clear brush pen and these Copic colors-BG0000, BG000, BG01, BG02, BG07, BG18, C00, C0, C1, C3, C5, C7, G29, G40, G43, G46, YG91, Y15, E41, E44, E47, E50, E51, E55, R81, R83, R85, and R89.

Friday, January 6, 2017

Happy Power Poppy Friday and a New Power & Spark Challenge!


Hi there and Happy Friday to you!  Are you ready for the weekend?  I know I am!  Today I have a card to share for Power Poppy's very first Power & Spark Challenge for 2017!  Our lovely and super sweet CAS card queen, Stacy Morgan, is the hostess this month and her challenge is Winter Blooms.  Just take a lookie at this....


Here is what Stacy has to say about her challenge:

"When winter comes, many of us long to say goodbye to the chill and say hello to those cheerful and fresh spring flowers! Did you know there are lots of blooms that sprout at the end of winter (you can cheat and include early spring as well)? How about camellias, crocus, paperwhites, holly, snowdrops, or poinsettias? Let's see how you can bring these pretty little petals and glorious greens to life and enjoy this last bit of winter as well!"

To make it super easy for you, here is a direct link of all Power Poppy winter blooms! 


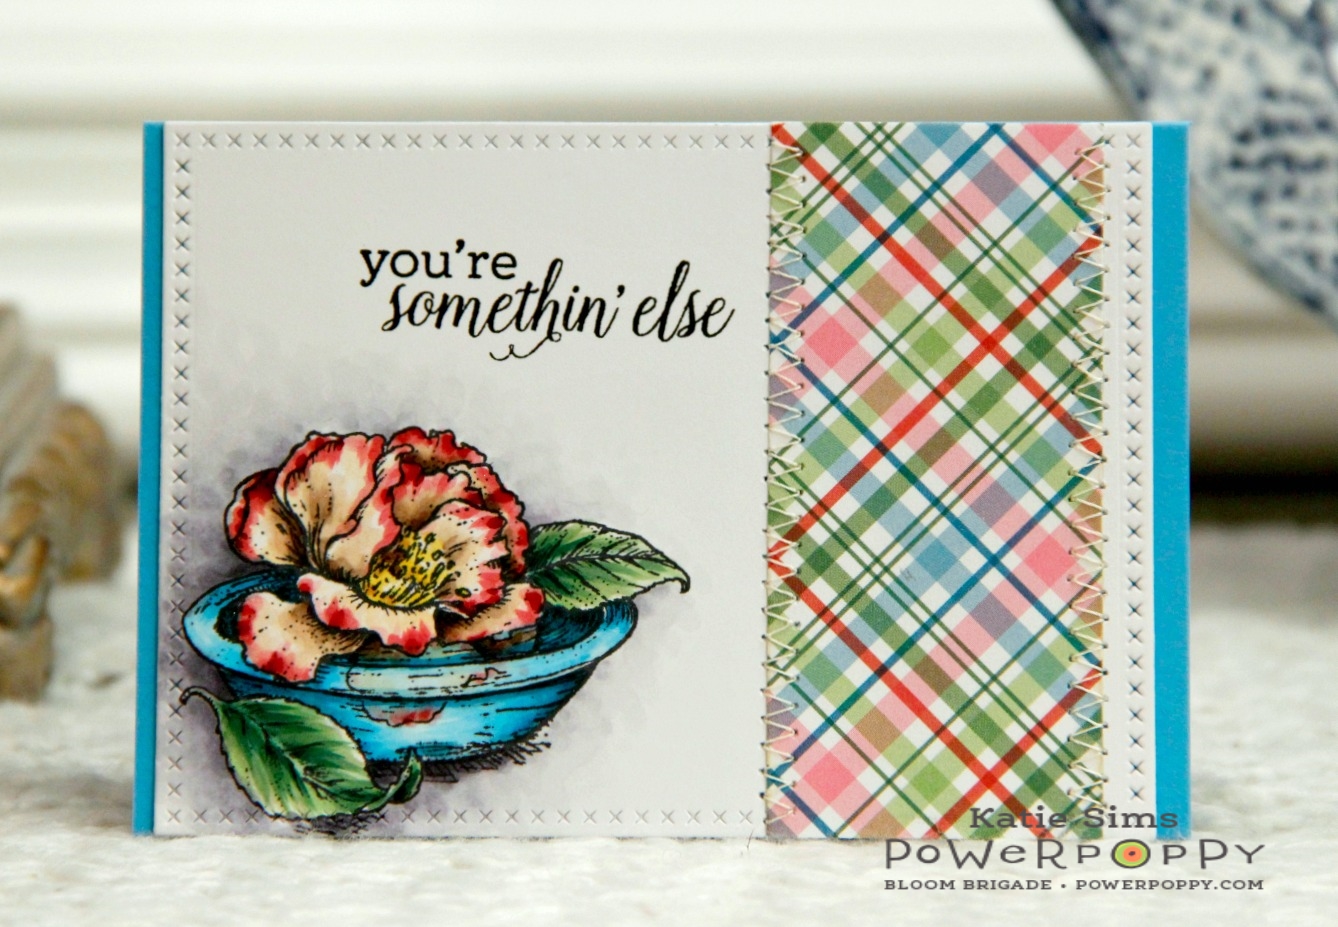
For my card, I chose to use the gorgeous Simply Camellias stamp set.  I also used a sentiment from Tea in the Garden stamp set.  


I started by stamping my image with Memento Tuxedo Black ink and die cut it out with a die from My Favorite Things, Die-namics Cross Stitch Rectangle.  Next, I colored the image in with Copics and added a little gold leafing with my Krylon 18KT Gold Leafing pen.  After that, I die cut out my card base and a stitched panel using a Papertrey Ink die set, Noted: Scalloped A2 Vertical Die.  I also trimmed a couple of extra layers of paper using a paper trimmer.  I used some Chamomile and Chai ink from PTI to age the edges a bit.  Next, I started adhering my layers together, added some ribbon, button, and twine and then adhered it to my card base.  To finish off my image, I added some fine glitter to some of the petals then attached it to my assembled card.  There was no need for any stitching on my card, the dies did a beautiful job instead!  :)


Mercy, how I love camellias!  I actually have a few blooms on one of mine now!  I can never get enough of all of the glorious detail Marcella puts in each and every bloom.  What a dream this beauty is to color up!


Here is one last peek at my card.  The patterned papers are from  Anna Griffin's "Calisto" 5 x 7 paper pad I recently purchased.  I certainly hope that you enjoy this day and your weekend!  Please make sure you hop around and see what many of my incredibly talented Bloomie sisters have created for your Friday inspiration and then c'mon and play along with us this month for Stacy's wonderful challenge!  Don't forget to link up a picture of your card to the Power Poppy Blog for a chance to win a prize!  Thank you so much for stopping by and I hope to see you around again soon....until then, take care!

Cindy Lawrence    
Julie Koerber 
Kathy Jones 
Katie Sims <------You are here 
Stacy Morgan 
Tosha Leyendekker

~Katie

Supplies not listed above:  Paper-Rustic White and Spring Rain card stock from Papertrey Ink; Other- Spring Rain ribbon, fine linen button and scrap twine from PTI and these Copic colors:  BG0000, B000, B91, B95, E0000, E000, E41, E44, BV11, BV13, RV10, RV21, RV25, RV29, Y35, G29, YG61, YG63, YG67, and YG91.

Friday, May 1, 2015

It's a Power Poppy Friday AND a new Power & Spark Challenge!


Well hello there....long time no see, right?  How have you been?  Things are going well here and today is pretty exciting because the new Power Poppy Power & Spark Challenge is starting today!  Woo Hoo!  I have really enjoyed these monthly challenges and today's is sure to be a hit....it's hosted by that super sweet CAS Queen  Stacy Morgan and if you love to fussy cut, then you are in for real treat.  You can check out all of the details here.  For today's card I thought I would take a simpler approach with minimal layering so the fussy cut bloom would truly be the star....so let me show you what I created.


As you can see, this card is a little less like my normal "lots of layers" approach.  I stamped my single Camellia bloom image from the Simply Camellias stamp set twice using Memento's Tuxedo Black ink, once on pink patterned paper and once on green patterned paper.  I fussy cut the the pink paper Camellia and included the leaves and then cut the stamped leaves out of the green paper and glued them directly to my pink paper stamped image.  Next, I took a few Copics in pinks and greens and gave the image some depth.....nothing fancy, just a few quick  brushes of color here and there to give the image more dimension.  Next, I took an ivory card stock panel, ran it through my Grand Calibur with a Stampin' Up! embossing folder to give me a little decorative oval, and then stamped my sentiment from the Sunny Harvest stamp set.  Some stitching came next, adding a simple border and then a zig zag stitch to adhere the red gingham paper.  I adhered my fussy cut bloom with some Scor Tape and then added a button with hemp cord to balance it out a bit.  I felt like it needed a little something else so I took some more of the pink patterned paper a little larger than my image panel and adhered it off set so the upper left corner had a bit of pink.  I added some Chamomile distress ink from Papertrey Ink around the card panel, gave my bloom some shimmer with my Wink of Stella clear pen and adhered everything to an ivory card stock base.  This card is dainty, measuring in at 3 5/8" x 4 5/8".


I just love that single Camellia bloom....it reminds me of the Camellias around our house.  Since the image was stamped on patterned paper, the coloring was minimal so this card came together pretty quickly.  I love the sweet embossed oval (can you believe I have had this embossing folder for quite a while, yet this is the first time I have used it?).  Well, that is pretty much all for my card, but some of my Bloomie team mates have created some true jewels for your inspiration so be sure to check them out....and don't forget to check out May's Power & Spark Challenge!  We would love for you to come play along with us!  Thank you so much for stopping by for a visit and until next time, take care!  :)


Julie Koerber  
Katie Sims <------You are here
Leslie Miller 
Stacy Morgan 

~Katie

Supplies not listed above:  Paper- Classic Ivory card stock from Flourishes, pink and green patterned papers from Simple Stories' "Vintage Bliss" 6x6 paper pad, red gingham paper from scrap box; Embossing folder-Stampin' Up!'s Textured Impressions Designer Frames; button and hemp cord from stash; and these Copic colors:  R30, R32, R35, R37, G43, and G46.

Monday, March 30, 2015

Power Poppy's April Stamp Release Day 2- Simply Camellias


Hello there and I am so glad you could stop by today.  Did you enjoy yesterday's hop?  Those lilacs are pretty spectacular, right?  Well, this next set is equally amazing and I think you will agree.  Why don't we just take a peek at Simply Camellias, shall we?


See, I told you!  Can you believe we now have a full stamp set dedicated to glorious camellias?!  I know...I am positively giddy!  I am sure I will be using this set again and again.  For my card today, I chose to highlight a single bloom.  


Isn't she beautiful?  I love that single bloom floating in the glass bowl.  I thought she looked so elegant so I decided to create an elegant card base.  The card came together really quickly.  I used Papertrey Ink's Vintage Cream card stock and ran it through my Grand Calibur using several dies from a couple of sets.  Some of my layers got the gold leafing treatment and some I kept plain.  For the very top die cut, I sponged on some Ranger Distress Ink in Weathered Wood and stamped the larger camellia image in Stampin' Up!'s Bordering Blue ink (I believe this ink is discontinued but I have hoarded a bottle....lol) while the paper was still in the die.  I then stamped my sentiment from this set in Versafine Onyx Black ink and stamped my single bloom image in Memento's Tuxedo Black ink on to some white card stock.  Once I colored my image, I fussy cut her out and used Ranger's Glossy Accents on the bowl.  I pulled out my Wink of Stella pen to add some shimmer to the bloom and I did add a bit to the water before I put the Glossy Accents on it.  Once it was dry, I adhered her to my assembled card using Collal. I think she looks completely at home here, don't you?  ;)


GAH.....will you just look at all of that wonderful detail!  This set has done nothing to curb my Camellia obsession in the least.....in fact, I feel pretty sure it has grown tremendously.  I am already thinking about the next one I need to get for my yard.  ;)  So that is all I have for my card today but there is more Camellia goodness for you to see compliments of my amazing Bloom Brigade sisters.  Make sure you leave them a little love while you are there and then be sure to check back tomorrow on the Power Poppy Blog for Day 3 of the April Stamp Release!  Thanks so much for stopping by and until next time, take care!

Christine Okken 
Cindy Lawrence  
Dawn Burnworth  
Julie Koerber 
Kathy Jones 
Katie Sims <------You are here
Leslie Miller 
Stacy Morgan 
Tosha Leyendekker
and Marcella Hawley

~Katie

Supplies not listed above:  
Paper-Classic White card stock from Flourishes; Dies-Spellbinders' Grand Squares, Classic Squares Large, Marvelous Squares and Marianne Designs Petra's Square Frames; Other-Krylon 18 KT Gold Leafing Pen, Spellbinders' Garden Lattice Reversible Embossing Folder and these Copic colors:  BG0000, BG10, BG11, BG18, YG61, YG63, YG67, YG91, Y15, Y19, Y21, RV00, RV52, RV55, RV63, RV66, RV69, and BV00.