Monday, March 30, 2015

Power Poppy's April Stamp Release Day 2- Simply Camellias


Hello there and I am so glad you could stop by today.  Did you enjoy yesterday's hop?  Those lilacs are pretty spectacular, right?  Well, this next set is equally amazing and I think you will agree.  Why don't we just take a peek at Simply Camellias, shall we?


See, I told you!  Can you believe we now have a full stamp set dedicated to glorious camellias?!  I know...I am positively giddy!  I am sure I will be using this set again and again.  For my card today, I chose to highlight a single bloom.  


Isn't she beautiful?  I love that single bloom floating in the glass bowl.  I thought she looked so elegant so I decided to create an elegant card base.  The card came together really quickly.  I used Papertrey Ink's Vintage Cream card stock and ran it through my Grand Calibur using several dies from a couple of sets.  Some of my layers got the gold leafing treatment and some I kept plain.  For the very top die cut, I sponged on some Ranger Distress Ink in Weathered Wood and stamped the larger camellia image in Stampin' Up!'s Bordering Blue ink (I believe this ink is discontinued but I have hoarded a bottle....lol) while the paper was still in the die.  I then stamped my sentiment from this set in Versafine Onyx Black ink and stamped my single bloom image in Memento's Tuxedo Black ink on to some white card stock.  Once I colored my image, I fussy cut her out and used Ranger's Glossy Accents on the bowl.  I pulled out my Wink of Stella pen to add some shimmer to the bloom and I did add a bit to the water before I put the Glossy Accents on it.  Once it was dry, I adhered her to my assembled card using Collal. I think she looks completely at home here, don't you?  ;)


GAH.....will you just look at all of that wonderful detail!  This set has done nothing to curb my Camellia obsession in the least.....in fact, I feel pretty sure it has grown tremendously.  I am already thinking about the next one I need to get for my yard.  ;)  So that is all I have for my card today but there is more Camellia goodness for you to see compliments of my amazing Bloom Brigade sisters.  Make sure you leave them a little love while you are there and then be sure to check back tomorrow on the Power Poppy Blog for Day 3 of the April Stamp Release!  Thanks so much for stopping by and until next time, take care!

Christine Okken 
Cindy Lawrence  
Dawn Burnworth  
Julie Koerber 
Kathy Jones 
Katie Sims <------You are here
Leslie Miller 
Stacy Morgan 
Tosha Leyendekker
and Marcella Hawley

~Katie

Supplies not listed above:  
Paper-Classic White card stock from Flourishes; Dies-Spellbinders' Grand Squares, Classic Squares Large, Marvelous Squares and Marianne Designs Petra's Square Frames; Other-Krylon 18 KT Gold Leafing Pen, Spellbinders' Garden Lattice Reversible Embossing Folder and these Copic colors:  BG0000, BG10, BG11, BG18, YG61, YG63, YG67, YG91, Y15, Y19, Y21, RV00, RV52, RV55, RV63, RV66, RV69, and BV00.

Sunday, March 29, 2015

Power Poppy's April Stamp Release- Lilac Time!


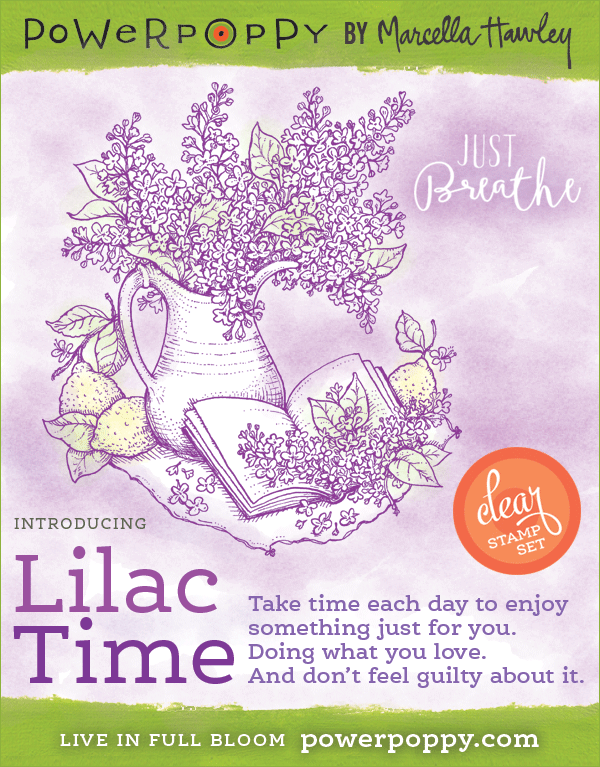
Hi there and a very Happy Sunday!  I hope this day finds you well and excited about Power Poppy's April Stamp release, the Scents and Sensibility Collection.  Oh friends, you are in for such a wonderful release this month.  Remember all of those gorgeous digital images Marcella has been gracing us with lately?  Well, so many requested stamp versions and guess what...uh huh....they. are. here!  Let me introduce you to today's lovely set, Lilac Time...


Can't you just smell the heavenly scent?  And lookie.....Marcella even paired a glorious pitcher of lilacs with a few lemons and a book!  What a sweet little scene, but that is not the only image you get with this set......I am sure when you hop around today you will catch glimpses of what all this wonderful set includes.  For now, let me show you what I created....


For this card, I had a couple of things in mind.  First, I wanted a shaped card.  Second, I wanted to create a card with a vintage feel ( I mean, I can't let a collection name like "Scents and Sensibility" go by without a vintage card, right? Love that little play on words!).  Third, I wanted to highlight another way to use a detailed stamp without a whole lot of coloring for those of you out there that shy away from that sort of thing.  :)  So, I started by stamping my image on to patterned paper with Memento's Espresso Truffle ink and then die cutting it out with the smallest Spellbinders Grand Oval die. 

 Using a patterned paper can drastically minimize your color time because you can pick and choose a couple of things to highlight about the image and let the paper do the rest!  I chose to dab a little violet color on my lilacs....and I do mean dab.  No fancy brush strokes here.  These blooms are small, so you don't have to worry about being precise....just dab away to your heart's content and it will look great!  I used three different shades of violet Copics to give some high and low lights and then went in with my Stampin' Chalk marker to dab a couple of white dots in there for more high lights.  I also added some color to the lemons and leaves.  For my pitcher, I used a light earth toned copic to give some shadow to the areas that needed it and then applied Ranger's Glossy Accents for the shine.  I went in with my Wink of Stella Clear pen and added some shimmer here and there and that is it.  I did not color the book or the cloth underneath  and I think it turned out just fine! :)  I added one of the many sentiments in this set and then layered and stitched my oval.  


And there is that incredible detail that Marcella is famous for.....isn't that image positively dreamy?!  The rest of the card came together quickly with a few die cut layers and a bit more patterned paper and stitching.  The ribbon, twine, and button add a little something sweet to finish it off.  I did use my Krylon Gold Leafing pen (it was getting lonely...lol)  to edge out one of the die cut layers.  Oh, one last little tip when you have a round or oval card shape....you can take your scissors and trim a teeny bit off the back of your card base bottom to make it level.  You will never notice it and it keeps your card from leaning when it is displayed.  :)

So that is all for my card today, but I know you have got to be itchin' to get a peek at what else this set has.....and you are in luck, because my incredibly talented Bloom Brigade sisters have several a-mazing cards to show you!  I know this to be true because a) they are awesome and b) I have already seen some of them and trust me when I say, they are going to blow your socks off!  ;)  So, have fun hopping around, leave a little love while you are there, and then join us tomorrow for Day 2 of Power Poppy's April Release!  I can't wait for you to see what's next!!!!  Until then, take care!

Christine Okken 
Cindy Lawrence    
Julie Koerber 
Kathy Jones 
Katie Sims <------You are here
Leslie Miller 
Stacy Morgan 

~Katie

Supplies:  Paper- Stampin' Up!'s Naturals White card stock and patterned papers from Teresa Collins' "Vintage Finds" 6x6 paper pad; Ink- Memento's Espresso Truffle, PTI"s Chamomile and Chai inks; Dies- Spellbinders' Grand Ovals, Grand Scalloped Ovals, and Opulent Ovals; Other- Krylon 18KT Gold Leafing pen, Ranger Glossy Accents, Spellbinders' Dainty Dots Reversible Embossing Folder, Very Vanilla ribbon and Stampin' Chalk marker from SU!, button and twine from PTI, and these Copic colors: V12, V15, V17, Y13, Y15, Y18, YG01, YG21, YG23, YG25, YG61, YG63, YG67, and E41.

Thursday, March 26, 2015

Look Who's Turning 1!


Hi there!  I'm so glad you could pop in today for a little birthday celebration.  Guess who is turning 1? Can you believe that Power Poppy has been enabling bloom enthusiasts for a solid year now?  The time has flown by, that is for sure!  It seems fitting that we are just entering Spring too, doesn't it?  :)  So, unbeknownst to the Bloom Whisperer herself, the Bloom Brigade has been conspiring to do this day up right!  So how about a little birthday blog hop, hmmm?


Now this isn't any ordinary blog hop.  Did I mention we wanted to do this day up right?  Well, you can check out all of the details on the Power Poppy Blog.  I will let you in on a little secret though....there is a BIG prize on the line.......take a look at this, will ya.....


That is one gigantic carrot to dangle, isn't it?  Wanna know how to win this big ol' gift certificate?  It is going to involve some hopping, some counting, and some mouse clicking.  Intrigued?  Well, you will have to check out all of the details on the Power Poppy Blog. :)

So before you jet outta here, can I show you my birthday card made especially for this day?  Ok, I'll try to be quick.....


I just had to use the Short Stacks set again!  Those sweet little stacks of lovelies are just waaaay too fun to color and I always think a cupcake is a good idea, so I chose this image from the set.  I stamped it with Memento's Tuxedo Black ink onto white card stock and then colored it with Copics. I used kraft card stock for my base and first layer and then layered a couple of pretty papers to make my little short stack feel at home.  The sentiment is also from the Short Stack set and I stamped it right on to some of the patterned paper with Papertrey Ink's Smokey Shadow ink.  I die cut my colored image with Spellbinders Labels Twenty Two and sponged some Ranger Distress Ink in Frayed Burlap to ground my image a bit.  I punched a couple of slits in the sides of my die cut so I could thread the ribbon through and tie my bow.  I added a button and a silver bloom charm for a little extra pretty and then used some Ranger Glossy Accents and my Wink of Stella clear pen to give a little shine.  


That short stack looks party ready, don't you think?  Well, I'm hoping that one Peep-in-Chief thinks so!  **Marcella, I hope that you have a wonderful day today celebrating Power Poppy's first year and here is to many more to come!  I have loved every minute of this journey with you and all of the amazing Power Poppy ladies.  What you have been able to accomplish in one year is incredible and I cannot wait to see what all you have in store for all of us in the future.  I am so proud of your success and even more proud to be a part of your beautiful company.  Sending much love and gratitude to you, dear friend, on this special day!  

Ok, so now are you ready to see what the rest of the Bloom Brigade has created to celebrate Power Poppy's big day?  Make sure you leave them a little love along the way and check out the blog to find out how to win that a-mazing prize!  ;)  Thanks so much for stopping by and sharing all of the fun...it just makes it that much more special!  Oh, and remember......Power Poppy's April stamp release is just around the corner so pop back by soon, ok?  Until then, take care!  :)

Christine Okken 
Cindy Lawrence  
Dawn Burnworth  
Julie Koerber 
Kathy Jones 
Katie Sims <------You are here
Leslie Miller 
Stacy Morgan 
Tosha Leyendekker

~Katie

Supplies not listed above:  Paper- Patterned papers from Echo Park's "Fine and Dandy" 6x6 paper pad and My Mind's Eye's Lost & Found Two "Blush" 6x6 paper pad, Classic White card stock from Flourishes; Other-Ribbon and Stampin' Chalk marker from Stampin' Up!, button and twine from Papertrey Ink, charm from Michael's and these Copic colors:  E40, E41, E42, E44, R11, R20, R21, R22, R24, R27, R29, YG21, YG23, YG25, YG60, Yg63, YG67, Y32, BG0000, BG000, BG53, and BG57.

Friday, March 20, 2015

It's Power Poppy Friday and a Dancing with Daffodils Encore!


Hello  there and Happy Friday to you!  I am so glad the weekend is near, how about you?  Do you have any special plans?  I am hoping the weather will cooperate here so I can get to work on some severely neglected azalea beds before they start to bloom.  They are needing a little love to say the least.  :)  I am here today with the rest of the Bloom Brigade to give you a second helping of Dancing with Daffodils.  This is the incredibly beautiful March digital image that the Instant Gardeners debuted on the 15th.  If this image doesn't get you in the Spring mindset, I just don't know what will...


All together now.......sigh.  I know....I don't know how she does it but Marcella continuously comes up with new images to take our breath away!  So let me show you what I did with this oh-so-fun to color up image!  :)


I chose to pair up this image with a sentiment from the Springtime Love stamp set.  Talk about a match made in heaven, right?  I did get a little giggle because doesn't that snail look like he is doing just that?  That's one happy lil' guy!  

So, for my image, I resized it in Microsoft Word, printed it out and colored it up with an insane number of Copics.  I will list them all below for you.  :)  Once everybody was colored up, I sponged on some Ranger Distress ink in Frayed Burlap and spritzed some ink from some SU! markers to give it natural look.  I used my Atyou Spica clear glitter pen to give some sparkle to the daffodil center and to my periwinkle.  (I also used it to trace around the word "daffodils" on my sentiment panel.)  Next, I added some pearls to the periwinkle centers and colored those with one of my Copics. 


 To give the snail body a little shine, I applied some Ranger Glossy Accents.  For the snail shell, I tried something new. I had a Cream Pearl Pen from Viva Decor that I use from time to time to add little pearl accents.  I thought I would try applying it with a paint brush in a thin layer on the shell to see what kind of effect it would give....and I really like how it turned out.  It definitely gave it a pearly sheen which I think looks great but I am not sure the pictures will pick it up.   I drug out some old photo corners I had stashed away and used those on my image panel and matted it with some orange card stock.  The rest of the card are some layers of Kraft, yellow, and more orange card stock and a layer of yellow gingham paper.  For my sentiment die cut I wanted to add a little something to it so I pulled out my recently busy Martha Stewart Hydrangea punch yet again to make a daffodil bloom.  I used another mini punch from Stampin' Up! for the center of the daffodil. I used my stylus to cup the punched shape....I don't think you can tell that this came from a hydrangea punch, can you?  Anyway, it was the little somethin' somethin' I was wanting and that finished my card.  :)


So, are you ready to go color up your own daffodils yet?  Well, before you do, make sure you check out what the rest of the a-mazingly talented Bloom Brigade ladies have created for your inspiration.  Make sure to leave them a little love along the way.  If you haven't added this digital image to your collection yet, why don't you skedaddle on over to the Power Poppy store and make this beauty your own today!  Oh, and for more daffodil eye candy, you can check out Power Poppy's Dancing with Daffodils board on Pinterest here.

I am so glad you were able to stop by today for a visit and I hope you will pop back in soon.  Good things are coming soon at Power Poppy....I think you are going to love this new April release....ok, I know you are going to love the new release!  ;)  Well, until next time take care and I hope you have a great weekend!  ;)

Christine Okken 
Cindy Lawrence  
Dawn Burnworth
Dina Kowal  
Julie Koerber 
Kathy Jones 
Katie Sims <------You are here
Leslie Miller 
Stacy Morgan 
Tosha Leyendekker

~Katie

Supplies not listed above:  Paper-yellow gingham from Paper Studio, yellow and kraft card stocks from SU!, orange card stock from PTI; Dies-Spellbinders' die sets in A2 Matting Basics A and Labels Eighteen; Other-these Copic colors-Y000, Y13, Y15, Y19, Y26, YR09, YR12, YR18, YR24, YR27, E51, E53, E55, E59, E81, E84, E87, YG03, YG61, YG63, YG67, YG91, G40, G43, G46, BG78, B60, B63, B66, and B69.

Friday, March 13, 2015

It's Another Awesome Power Poppy Friday!


Hi there and a very happy Friday to you!  Have you had a good week?  Checked out the latest goings on over at the Power Poppy Blog?  Have you been able to get in any crafty time lately?  I hope so!  I was able to sneak in my craft room for a bit this week to put together a card for a sweet friend of mine.  To say that she loves cauliflower would probably be an understatement so I thought this darling little cauliflower image  from the Farmer's Market set would be perfect for a card for her!


I started by stamping my little basket of cauliflower on to card stock with Memento's Tuxedo Black ink.  Next, I colored it in with Copics and fussy cut it out  but I wanted to add a little more dimension without a lot of extra fussy cutting.  Hmmm,  so I took my stylus and made a few indentations from the front so I could then turn it over and really emboss some dots from the back where the cauliflower florets were. After that, I added some sparkle on the florets with my Atyou Spica clear glitter pen.  To finish it off, I stamped the dainty little "Just For You" sentiment with Versamark ink and embossed it with white embossing powder and my heat gun.  Amazing how much detail that wee little sentiment has!  :)  

For my sentiment, I used a die from one of my treasured Marianne Design die sets, Petra's Square Frames.  I thought the shape looked a little like cauliflower.  I stamped the "Share what you Love" sentiment, sponged on some Ranger Distress ink in Peeled Paint and then proceeded to assemble my panels for my card.  Just a couple of patterned papers, stitching, and ribbon treatment set the scene for my sentiment die cut and sparkly cauliflower basket.  


I tried to get a photo to show the dimension of the cauliflower but I am not sure you can really see it in these photos.  I can't recall a time when I have stamped over something I have colored with copics and then heat embossed it...but I think it really turned out great.  Whew!  And first time too.....I was a little nervous since I had already colored the entire image (when will I learn?) but it turned out A-okay this time!  


Don't you just love that sentiment.  I will take it one step further and add with the "peeps that you love"....so this card is going to one big hearted, incredibly creative, cauliflower super freak that I just adore!  ;) 

Ok, so now that I have shown you my card, how about taking a little hop around and see what some of my a-mazing Bloom Brigade sisters created for your Friday inspiration.  And, if you haven't played along with our March Power and Spark Challenge that Tosha Leyendekker threw down last week, you really need to check that out too!  It lasts all month and you could end up winning a stamp set of your choice!  Yay!  Ok, so that's all for me today but I am working on a little something for some upcoming posts (Ahem, April Power Poppy Release, cough cough) so I hope to see you back soon and until then, take care!  :)


Christine Okken   
Dawn Burnworth
Katie Sims <------You are here 
Stacy Morgan 

~Katie


Supplies not listed above:  Paper- Naturals White and Lucky Limeade card stocks from Stampin' Up!, Classic White card stock from Flourishes, patterned papers from My Mind's Eye's "Dolled Up" 6x6 paper pad and Lilybeedesign's "Double Dutch" 6x6 paper pad; Ink-  Versafine Onyx Black ink, Papertrey Ink's Chamomile ink; Other-  Certainly Celery satin ribbon from SU!, white twine and button from PTI, and these Copic colors-  YG0000, YG01, YG21, YG23, YG61, YG63, YG67, E30, E33, E35, E37,E57, E59, W01, W03, N5, N7, and N9.

Friday, March 6, 2015

Power Poppy's March Power and Spark Challenge


Hi there everybody!  Can you believe it is March already?  Mercy, these frigidly cold days certainly have been flying by lately!  I hope you have been able to keep up with the goings on over on the Power Poppy blog these last several weeks.  Marcella has really been kicking things up a notch with new digis every month, the addition of a digital release team-the fabulous Instant Gardeners, and the new monthly Power and Spark challenges.....whew!  It's enough to make your head spin!  Today is the day for the start of the March Power and Spark Challenge and the incredibly talented and super sweet Tosha Leyendekker is your hostess.  Now, let me just say, this girl knows the way to my heart....do you know what her challenge theme is?!?  Well, just feast your eyes on this...


I know, right?  If there was ever a challenge with my name on it, then this is it!  :)  Me and my Krylon 18KT Gold Leafing pen have been tight for quite a while....lol.   So let me show you what I did for this awesome challenge...


I have been smitten with that little stack of tea cups and sweet birdie from the Short Stacks stamp set since I saw this image.  Those cups remind me of some of my grandmother's old china.  It is soft blue and white with gold edging....the edging is worn in several places from lots of use, but that makes me love it even more.  I thought it would be fun to try to gives these darling cups a "well loved" look by making the gold edging look worn.  I started by stamping my image with Memento's Tuxedo Black on to white card stock.  I colored my image with Copics and stamped my sentiment from the Geraniums Take Two set with Versafine Onyx Black ink.  Next, I die cut my image and gold leafed the edge.  I have a gold pen that my dear friend and fellow pen nerd gave me so I thought I would try it out for some of the fine gold detail on these cups....and it worked like a charm!  I used it to fill in the wee leaves and buds on the cups with gold.  I wasn't sure how it would work on the handle, so I tried something new.  I took my Krylon gold leafing pen and dabbed some of the ink until it pooled on to a spare piece of paper and then took a fine paint brush and dry brushed  a little of the gold leafing ink onto one of the cup's rim and handle.  You have to have a  light touch doing this....I loaded up my brush and then blotted it before I actually painted my cup.  It gave it a great look....kind of worn, which was exactly what I was going for here! 


Next, I worked on my frame for my image.  I ended up using two of these die cuts to fit the size of my main image oval and gold leafing them with the same Krylon Gold pen.  I wanted my frame to look a little tarnished and worn, so I took a fine grit sand paper and lightly sanded the frame.  If you are careful, it will just take off the shiny top and leave the dark tint below...instant aging!  :)  My card base is A2 size and layered with card stock and patterned papers to coordinate with my colored image.  My panels are stitched and some of them are gold leafed along the edges.  A couple of the layers are popped up with foam dimensionals.   I wrapped some ribbon around two of the corners of one of the panels and added a bow.  To finish this card off, I added a really pretty rhinestone brad in the bow center.  I took another close up from a side view to try to show the aged frame and brushed gold on the image...


GAH, I still think that little bird is the cutest thing!  :)  So, are you getting inspired to go for the GOLD?  Before you start pulling out your supplies, you really need to see what my insanely talented Bloom Brigade sisters have gilded up for your viewing pleasure and inspiration.  Make sure you leave them a little love while you are there and then get going on your own gold masterpiece.  Remember to link up at the Power Poppy blog for a chance to win a prize!  I am so glad you were able to stop by today for a visit and I can't wait to see what you create!  Until next time, take care!  :)  Oh, and remember....we are only a few short days away from the next incredible Marcella digital image release and another stunning display from the Power Poppy Instant Gardeners...eeeeeeee!  I can hardly wait!  :)

Christine Okken 
Cindy Lawrence   
Julie Koerber  
Katie Sims <------You are here
Leslie Miller 
Stacy Morgan 
Tosha Leyendekker 

~Katie

Supplies not listed above: 
Paper:  Stampin' Up!'s Naturals White card stock, Flourishes Classic White card stock, red card stock from scrap, patterned papers from Teresa Collins' Fabrications "Canvas" 6x6 paper pad; Ink:  Ranger Distress Ink in Frayed Burlap, Papertrey Ink's Chamomile ink; Spellbinders die sets Classic Ovals Large, Opulent Ovals, A2 Matting Basics B; Other:  ribbon-Stampin' Up!'s Lost Lagoon taffeta ribbon, gemstone brad from The Paper Studio, Ranger Glossy Accents for the flowers on the tea cup, gold pen from Tul, and these Copic colors:  R11, R12, R14, R17, R39, BG0000, BG000, BG53, BG57, BG78, Y26, W00, W0, W2, W3, W5, and E50