Saturday, June 6, 2015

Power Poppy's June Stamp Release-Day 4!


Hello there and a very Happy Saturday to you!  I am so ready for this weekend, how about you?  Well here we are at Day 4 of Power Poppy's June Stamp release....and let me tell 'ya, this set is really gonna blow your hair back!  ;)  Just get a load of Move the Soul...


Now you may be thinking, but it's not flowers....and you would be right...but I had an absolute blast with this set!!  When I saw this, I immediately thought of my nephew and started thinking about what kind of card I could make for him.  Now, if I know his Aunt Katie....and I think I do, then this will probably accompany a really cool Lego set that he and I can put together at his next visit.  :)  So let me show you what I created...


Why yes, that is a pterodactyl in the photo....right along with one of Uncle Matt's old penny racers and a couple of transformers.  How astute of you to notice....and I am sure there is one nine year old that is going to notice that too!  ;)  I couldn't resist gathering some of his toys that he has here to put in the photo!  

For my card, I picked out some really fun patterned papers as my starting point and then I did a little light coloring of my image to pick up the colors from the papers.  I stamped my image directly onto some notebook patterned paper.  This image was surprisingly easy to color...the sketchy lines of the image means you do not have to be exact which is a good thing!   Honestly, this image could be left completely uncolored and be fabulous!  Can you imagine it stamped on some kraft wrapping paper?!  Ooooo, may have to do that next to go along with the Lego set!


I punched a notebook paper edge with an old Stampin' Up! punch I had and stamped some stars that came in this set in different colors.  Now, the sentiment I had to give a special treatment to because "Let's Roll" is a phrase that my nephew uses a good bit when it's time to go somewhere (like Target aka The Mother Ship....land of all things Lego and Transformer).  So, I die cut a little band out and stamped the sentiment a few times.  My black layer is actually die cut from a postage stamp edge rectangle but I thought it made good tire treads!  I then stamped some for real tire treads on the sentiment strip.  My card layers are simple but I did do a little stitching because even though I know there is not a sewing machine in the land of all things automotive, his Aunt Katie apparently doesn't know how to make a card unless she does that, so she did!  :)


A few metal brads, a paper clip, and a bit of button, ribbon, and twine finish this off.  I did add some Wink of Stella to the chrome parts of the bike to give a little shine.  And there you have it, my very first motorcycle card....but definitely not my last!  I am always in need of masculine card stamps so this one will be really fun to stamp with and....thanks Marcella, for pulling me out of my flower box!  :)

So that is all for my card today, but remember...we still have one more day of stamp release THEN we all get together for one last blog hop to show off all of the stamp sets again.  Yay!  Make sure you check out what my awesome Bloom Brigade teamies made for your inspiration today and leave a little love while you're there and then I'll be looking for you tomorrow for Day 5!  Until then, take care!  VRRRROOOOMMMM!  :)

Katie Sims <------You are here 
Stacy Morgan 
Tosha Leyendekker
and Marcella Hawley

~Katie

Supplies:  Paper-  My Mind's Eye's Lime Twist "Out of the Blue" and Lost & Found "Market Street" 6x6 paper pads, Papertrey Ink's Rustic White card stock, Stampin' Up!'s Basic Black card stock; Ink-Memento's Tuxedo Black, Tsukineko's Versafine in Onyx Black, Stampin' Up!'s Poppy Parade, Island Indigo, Going Gray, and Lucky Limeade, Papertrey Ink's Chamomile and Chai distress inks; Other- Spellbinders die set A2 Fancy Postage Edge, Papertrey Ink's Photo Finish Strips die, Ribbon from SU!, button, string, and various brads from my stash, Wink of Stella Clear pen, Tim Holtz paper clip and these Copic colors: R22, R24, R29, R39, BG72, BG75, BG78, Y02, YG21, YG23, YG25, YG93, E000, E11, C0, C1, C3, C5, C7, W1, W4, and W5.

Friday, June 5, 2015

Power Poppy's June Release-Day 3 AND a Surprise!


Hi there and welcome back for Day 3 of Power Poppy's June stamp release!  I hope you have been enjoying the peeks so far.  Just think, we are only half way through too!  Today's stamp set has a bit of the familiar mixed with some fresh and new images....so let's Go Wild!


Now, before we really get going here there is something you should know....today is a very special day for one very special lady!  I think she thought that today's posts would go by with not a word mentioned but we just couldn't let that happen.....not when it's the birthday of the Bloom Whisperer, herself!  Marcella, I am wishing you a day full of all the things you love the most and here's to another wonderful year of good times, the love and support of family and friends, and more stamps!  Hee.....I just had to add that last little thing.... :)  Sending many hugs your way, birthday girl!

So, for my image I went for this sweet pitcher of roses and strawberries.  It made it's debut as a digi but now Marcella has given it a place of honor in this lovely set.  I stamped it off with Memento's Tuxedo Black onto white card stock and colored it with Copics.  Next, I added some Ranger Crackle Accents because I just didn't get enough of it on my card on Monday....:) and let that dry.  I die cut some layers for my card and made a simple square card base.  I stitched my patterned papers and added some distress inks to everything.  This sentiment stamp from the set is actually all on one line so I inked a portion of it at a time and stamped it on my oval die cut so it would fit in the space.  Once my pitcher was dry, I added gold leafing around the edge and used a hole punch to notch out a place so the image panel would fit snugly against my bow.  I assembled the layers and used foam dimensionals to pop up the image panel and sentiment oval.  


I also added gold leafing around the sentiment to give it a little extra shimmer.  Oh, and I used my Atyou Spica Clear glitter pen to add some shimmer to the blooms and berries.


One last peek.....


Make sure you check out all of the gorgeous creations by my Bloomie team mates for Marcella's big day!  Oh, and pop on over to the Power Poppy Blog and you can leave some birthday wishes there too!  Ok, three down and three more to go, so I hope you can stop back by tomorrow for a little bit of the unexpected.  If you listen really close, I think you can hear a faint chorus of "Bad to the Bone" playing....;)  Until then, take care!

Cindy Lawrence    
Julie Koerber 
Kathy Jones 
Katie Sims <------You are here
Leslie Miller 
Stacy Morgan 
Tosha Leyendekker
and Marcella Hawley


~Katie

Supplies not listed above:  Paper-Simple Stories "Summer Fresh" 6x6 paper pad, Flourishes Classic White card stock, Stampin' Up!'s Naturals White card stock; Inks-Ranger Distress Ink in Antique Linen and Scattered Straw, Papertrey Ink's Chamomile and Chai inks; Other- Marianne die set Petra's Square Frames, Spellbinders' Classic Squares Large set and Fancy Framed Tags Two set, Krylon 18KT Gold Leafing pen, Ribbon from Michael's, button from PTI, hemp cord, and these Copic colors:  YG61, YG63, YG67, YG91, BG93, BG96, W00, W0, W1, W2, W4, W5, W7, W8, C0, C4, C7, E11, E30, E35, E40, E50, E53, E55, E57, R21, R24, R29, YR30, Y15, Y21, Y26, and Y32.

Thursday, June 4, 2015

Power Poppy's June Release-Day 2!


Hi there and welcome back for Day 2 of Power Poppy's June stamp release!  How did you like yesterday's amazing Poppies stamp set?  That set makes me so very happy but I have to say...today's set is quite a beaut too!  Just have a look at Sage Advice...


When I first saw these images, I know I squealed.  I mean, is that not the most darling colander of herbs?!  The mixed fonts for the sentiments are pretty sweet too....I fell head over heels for the one I used for my card today.  So let me show you what I created....


I stamped my image with Memento's Tuxedo Black ink onto white card stock and colored my image up with a boat load of Copics .  Now, I have to give a shout out to the a-mazing Jennifer Dove and her Color of the Day ideas because I referenced that to color my colander.  She had some Copic color ideas that were perfect for what I wanted to do....so a huge thank you Jennifer!!  :)  

After coloring, I die cut my image out with a Spellbinders oval die and sponged on some Ranger Distress inks in Peeled Paint and Frayed Burlap then added a little Papertrey Ink Chamomile and Chai distress inks around the edges.  My card base is an A2 size cream card stock.  I cut a slightly smaller layer, used Stampin' Up!'s Vine Street embossing folder and embossed part of it and then stitched my patterned paper to it.  I stamped the sentiment in more Tuxedo Black ink and then stamped the little chive bracket with some Stampin' Up! Old Olive ink.  To finish things off I used my Wink of Stella clear pen to give some shimmer here and there to my colored image and to the little chive bracket around the sentiment.  I assembled my layers, using foam dimensionals to pop the image oval then added buttons and hemp cord to add that "one more thing" I thought it needed.  :)


Don't you just love the looks of old copper kitchen ware?  And all of those beautiful herbs with the wonderful detail that Marcella is known for.....does it make you wanna squeal too?  :)  I'm with ya....


You'll have to forgive my little photo shoot today....I had some extra time to take photos and I guess I got a little carried away.  I actually put this card in the antique china cabinet in our kitchen for the photos.....don't you think it looks right at home there?  That may be where it stays for a while!  

Well, that is all for my card today but my Bloomie sisters have created some mighty pretty cards for your crafting inspiration so make sure you to pay them a visit and leave a little blog love while you're there.  So glad you were able to stop by today for a visit and why don't you just come on back tomorrow for Day 3 of Power Poppy's June release.....I'd love to see ya!  Until then, take care!  :)
  
Julie Koerber 
Kathy Jones 
Katie Sims <------You are here 
Tosha Leyendekker
and Marcella Hawley

~Katie

Supplies not listed above:  Paper-Carta Bella's "Traditions" 6x6 paper pad; Flourishes card stock in Classic White and Classic Ivory; Buttons-Papertrey Ink; and these Copic colors:  E08, E21, E30, E35, E37, E39, E40, E41, E42, E43, E44, E97, YG21, YG23, YG25, YG91, YG93, G40, G43, G46, G82, G85, YR23, YR24, YR27, Y23, Y25, Y26, R02, R05, R08, BV00, BV04, BG93, and BG96.

Wednesday, June 3, 2015

Power Poppy's June Release-Day 1!


Hello there and a happy Wednesday to you!  I hope all is well with you and you are getting your summer off to a good start!  And speaking of a good start, today just so happens to be Day 1 of Power Poppy's June stamp release......oh, the lovelies you will see this week from that Marcella!  She has been hard at work creating the most gorgeous images to get your summer started right!  Today's featured set is the long awaited namesake.....Poppies.  Trust me when I say, this set has most definitely been worth the wait......wanna see?


Tears, right?  Yep, me too.  All of those gorgeous poppies and to really up the ante, Marcella put them in an old Chinese Ginger jar!  AND.....wait til you see all of the lovely sentiments and the other image in this set!  I know this is going to be a huge favorite with all of you...it already is one of mine!  :)  So, let me show you what I created....


I started by stamping my image with Memento's Tuxedo Black ink on to some cream card stock.  Next, I die cut it out using Spellbinder's Labels Twenty Eight and colored my image with many Copics that I will list below.  After I was done coloring, I sponged on some Ranger Distress Ink in Weathered Wood and edged it with my Krylon 18 KT Gold leafing pen.  Then, I added some shimmer with a Wink of Stella Clear pen and I added Ranger's Crackle Accents to the Ginger jar to give it a crackle texture.  I think you will be able to see it in one of the photos below.  To attach my ribbon, I punched two holes in one side and tied my bow.  My card base is made using some Poppy Parade card stock from Stampin' Up! (talk about a coincidence.....;)  I layered and stitched a couple of patterned papers from Authentique's "Carefree" 6x6 paper pad and adhered them to my card base, then attached my assembled image panel with foam dimensionals.  As a final touch, I added some white back in to the centers of the poppies with a Stampin' Up! White Stampin' Chalk Marker.


How 'bout them poppies?!  Marcella really gave them the royal treatment putting them in that gorgeous jar....and, to make this really special, the symbol on this Ginger jar means "Double Happiness".  Wouldn't that make a wonderful wedding or anniversary card?!  What a sweet detail Marcella added!  :)  Hopefully, you can see the crackle finish on my jar...


So that is all for my card, but you know that my Bloomie team mates have created some a-mazing cards for you to see so go take a peek, leave them a little blog love, and then I would love it if you could pop back by tomorrow for Day 2 of Power Poppy's June stamp release.  So glad you could visit today and until tomorrow, take care!  :)

Cindy Lawrence    
Julie Koerber 
Katie Sims <------You are here
Leslie Miller 
Stacy Morgan 
and Marcella Hawley

~Katie


Copics:  R01, R02, R11, R14, R17, R29, R59, BG72, BG75, BG78, BG90, BG93, BG96, BG99, C0, C01, C02, C05, C07, Y15, and YR24.

Friday, May 29, 2015

It's another Power Poppy Friday!


Hi there and welcome to my little corner of blog land.  I hope all has been well with you!  Do you have any fun summer plans?  Any awesome crafty projects in process?  I wanted to share a quick little card I made for this week's Power Poppy Friday and since the May Power & Spark Challenge deadline is drawing near, I wanted to play along again (gotta love fussy cutting)!  :)  Have you been able to enter one of your creations for this fun challenge?  You can read all of the details here and we would love it if you could play along with us....AND there will be a prize.....just sayin'.  So, lemme show you what I made......


Is that not the prettiest primrose image ever?  It is from the Potted Primroses set.  I thought it would be fun to make a bloom shaped card for these beauties, and I have to say.....they do seem to look right at home.  :)  Now, to make this work, while I was fussy cutting my blooms a few of them had to take one for the team (I know, but it had to be done) so it would fit on my card but I still think it turned out ok.  My card base shape and layers are from Spellbinders' Blossom Three set and I also used a Spellbinders Standard Circles die for the sentiment circle.  I die cut my layers from patterned papers, sanded, inked and then stitched them together.  Next I stamped my pretty primrose image with Memento's Espresso Truffle ink, colored it with Copics, fussy cut it out minus a few of the blooms, added shimmer with a Wink of Stella Clear pen, adhered pearls in the flower centers and attached it to my assembled card with foam dimensionals.  The sentiment is from the Simply Camellias set and fits perfectly cozied up to those primroses.  The seam binding and button were added before I put my layers on my card base or added the primrose image for a little extra something. :)


GAH, those darling blooms just make me smile!  Just the thing to brighten someone's day and send a little bloom love, don't you think?  I am also seriously crushin' on Marcella's font mix with this sentiment.....oh so sweet!  I took one more photo from the side so you could see the layers a little bit better....


So are you ready to get to fussy cuttin' and make your own creation?  Well, you still have a wee bit of time left, but you'd better hurry!  OH, and make sure you check out what some of my incredibly talented Bloom Brigade sisters have created for your inspiration today.....I have seen some of them already and let me just say.....WOW....you are in for a treat!  So, I guess that is all for me today, but I will be back soon with some more Marcella goodness......the June release images are incredible and I cannot wait for you to see!!  :)  Until next time, take care and thanks so much for stopping by!  

Cindy Lawrence    
Julie Koerber  
Katie Sims <------You are here 
Stacy Morgan 
Tosha Leyendekker

~Katie

Supplies not listed above:  Paper-Patterned papers from My Mind's Eye Miss Caroline "Dolled Up" 6x6 paper pad, Classic White card stock from Flourishes, Naturals White card stock from Stampin' Up!; Other-seam binding ribbon and pearls from SU!, button from PTI, pink twine American Crafts,Faber-Castell PITT artist pen, and these Copic colors:  R21, R24, R30, R32, R35, R37, YG00, YG01, YG03, YG91, YG93, YG95, G82, G85, and G99.

Friday, May 15, 2015

It's a Power Poppy Friday & A New Digital Release!


Hello there everybody and a very happy Friday to you!  I hope you have had an awesome week!  Boy, does Power Poppy have a treat for you today!  Traditionally, those fabulous Instant Gardeners- Power Poppy's Digital Design Team- herald in the latest and greatest digi image hot off of Marcella's desk but since today is a Friday, we thought it would be fun to rally all of the Bloomie troops for one huge blog hop to celebrate the arrival of Bees in Foxglove.  Just take a lookie at this beaut.......

Our newest addition to the Instant Garden Collection just happens to be one that's a tall beauty that's not only colorful but a dramatic beauty. Our newest set, Bees in Foxglove, features three lush stalks of foxglove (Digitalis) with three plump bumblees buzzing around doing their bumblebee thing! Add in a cheery all occasion sentiment and you have one stunning set that is ready to download, print, color and create with!


Have. you. ever?!  Oh, that Marcella has really outdone herself with this lovely image!  You are going to love all of the lovely detail with this image.....for sure!  Let me show you what I created.....


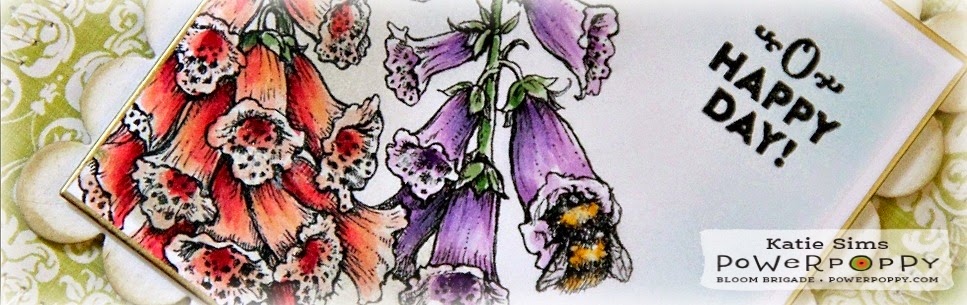
After printing this image out, I decided to crop a portion of it to highlight on this card.  Now, I have to say....the first time I saw this image I could not help but notice that these were absolutely the fuzziest fuzzy wuzzy bees ever....and so totally adorable in their little foxglove scene!  I'll bet they thought they hit the jackpot with these gorgeous blooms!  I colored the image with Copics, die cut it out, sponged on some distress inks, gold leafed it, and layered it with a scalloped square die cut all to show off these blooms and quite possibly the cutest little bee boo-tay of all time.....hee!  So here's a close up.......


The sentiment is from the  Dynamic Duos: Peonies and Tulips stamp set.  O Happy Day, indeed!  Does he not look like he is having a blast doing his little bee thing and takin' care of business?  And Marcella sure gave him plenty of gorgeous blooms to visit!  The rest of the card is a layer of stitched patterned paper on card stock and then the whole assembly is adhered to a square card base.  I added a little Wink of Stella in clear on the bee's wings and the flower centers.  I also used Papertrey Ink's Chai and Chamomile inks to distress my edges.  All of the wonderful shading cues in this image make it a snap to color up and there are several different ways you could crop this image to use just a portion of it for different ways to tuck in a sentiment or if you just want to show off the whole incredible image on one card and really knock someone's socks off then you can do that too!  ;)  This digital image does come with it's own sweet sentiment which I am sure you will be seeing along the hop.

So that's all for my card today but like I mentioned earlier, Marcella has combined the design teams together for this digital release so you have many incredible blogs to visit and see all of the wonderful possibilities for this one image....and after you have been wowed time and again (and I am sure you will with this amazing group of ladies) then you can go make this image your own.....like today....that's right, because this image is available today for you to download and color up your own bees and blooms to your heart's content!   That's the beauty of using a digital image, and if you like this one then check out the entire Power Poppy digital collection available here.  I am so glad you were able to stop by today for a visit and until next time, take care! 


Jennifer Dove
Broni Holcombe
Cheryl Scrivens
Danielle Kennedy
Debbie Olson
Allison Cope
Cindy Lawrence
Julie Koerber
Kathy Jones
Katie Sims <----------you are here!  :)
Leslie Miller
Stacy Morgan
Tosha Leyendekker

~Katie

Supplies not listed above:  Paper- Classic White card stock from Flourishes, Naturals White card stock and green card stock (sorry, can't remember which green) from Stampin' Up!, patterned paper from Fabrications "Canvas" 6x6 paper pad by Teresa Collins ; Ink: Ranger Distress Inks in Frayed Burlap and Tumbled Glass, Tsukineko's Versafine ink in Onyx Black (for the sentiment), Krylon 18 KT gold leafing pen; and these Copic colors:  YG61, YG63, YG67, YG91, R11, R12, R35, R37, R39, YR21, YR24, YR31, V01, V12, V15, V17, and V09.

Friday, May 1, 2015

It's a Power Poppy Friday AND a new Power & Spark Challenge!


Well hello there....long time no see, right?  How have you been?  Things are going well here and today is pretty exciting because the new Power Poppy Power & Spark Challenge is starting today!  Woo Hoo!  I have really enjoyed these monthly challenges and today's is sure to be a hit....it's hosted by that super sweet CAS Queen  Stacy Morgan and if you love to fussy cut, then you are in for real treat.  You can check out all of the details here.  For today's card I thought I would take a simpler approach with minimal layering so the fussy cut bloom would truly be the star....so let me show you what I created.


As you can see, this card is a little less like my normal "lots of layers" approach.  I stamped my single Camellia bloom image from the Simply Camellias stamp set twice using Memento's Tuxedo Black ink, once on pink patterned paper and once on green patterned paper.  I fussy cut the the pink paper Camellia and included the leaves and then cut the stamped leaves out of the green paper and glued them directly to my pink paper stamped image.  Next, I took a few Copics in pinks and greens and gave the image some depth.....nothing fancy, just a few quick  brushes of color here and there to give the image more dimension.  Next, I took an ivory card stock panel, ran it through my Grand Calibur with a Stampin' Up! embossing folder to give me a little decorative oval, and then stamped my sentiment from the Sunny Harvest stamp set.  Some stitching came next, adding a simple border and then a zig zag stitch to adhere the red gingham paper.  I adhered my fussy cut bloom with some Scor Tape and then added a button with hemp cord to balance it out a bit.  I felt like it needed a little something else so I took some more of the pink patterned paper a little larger than my image panel and adhered it off set so the upper left corner had a bit of pink.  I added some Chamomile distress ink from Papertrey Ink around the card panel, gave my bloom some shimmer with my Wink of Stella clear pen and adhered everything to an ivory card stock base.  This card is dainty, measuring in at 3 5/8" x 4 5/8".


I just love that single Camellia bloom....it reminds me of the Camellias around our house.  Since the image was stamped on patterned paper, the coloring was minimal so this card came together pretty quickly.  I love the sweet embossed oval (can you believe I have had this embossing folder for quite a while, yet this is the first time I have used it?).  Well, that is pretty much all for my card, but some of my Bloomie team mates have created some true jewels for your inspiration so be sure to check them out....and don't forget to check out May's Power & Spark Challenge!  We would love for you to come play along with us!  Thank you so much for stopping by for a visit and until next time, take care!  :)


Julie Koerber  
Katie Sims <------You are here
Leslie Miller 
Stacy Morgan 

~Katie

Supplies not listed above:  Paper- Classic Ivory card stock from Flourishes, pink and green patterned papers from Simple Stories' "Vintage Bliss" 6x6 paper pad, red gingham paper from scrap box; Embossing folder-Stampin' Up!'s Textured Impressions Designer Frames; button and hemp cord from stash; and these Copic colors:  R30, R32, R35, R37, G43, and G46.