Friday, October 21, 2016

Power Poppy's October Stamp Release Blog Hop!


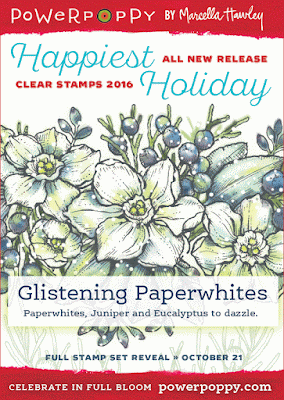
Hi there and a very Happy Friday to you!  Today marks the end of the Power Poppy October release which includes the newest additions to the Happiest Holiday clear stamp collection.  The Bloom Brigade is joining together for one last hop showcasing all of the new stamp sets.  Today is also the day that all of these amazing stamp sets are available in the Power Poppy store...more on that plus a little surprise at the end of this post!  Today, I chose to use the gorgeous set, Glistening Paperwhites....


Isn't this a glorious image?!  I am always amazed at the floral combinations Marcella creates....so very beautiful, so very elegant, and so very Marcella, don't you think?  I decided to go for a vintage and Christmas nostalgic look for my card.  I kept the card very simple and let the lovely image take front and center...well, a little off center actually, but I think you know what I meant!  ;)


I stamped my image and colored it up with Copics.  I also used a white pencil to add some highlights and soften things up a bit then sponged on some Ranger Iced Spruce Distress ink around my image to give it a little more depth.  After coloring, I added some ink spatters with a spritzing tool and then added some shimmer and shine with a few different pens and some Ranger Glossy Accents.  After all of that dried, I stitched on my patterned paper strip, sponged some ink around the edges, and tied on my ribbon.  I used a corner rounder on the top right corner, stamped my sentiment (also from this awesome set) and adhered this to a card base.  The finished size of this card measures 3 3/4"x 4 3/4".


I think I was able to capture a little of the sparkle of the card in this photo.  It really does glisten when the light hits it just right.  It reminds me of the cards we had when I was a little girl that had lots of sparkle on them.  Sweet memories of those Christmas traditions....

So that is all for my card today, but make sure you check out all of the card goodness from my amazing Bloomie sisters...and leave them a little blog love while you are there!  I hope you have enjoyed this release as much as we have enjoyed sharing our creations with you! :)  Make sure you check out today's post over on the Power Poppy blog too!  

Cindy Lawrence    
Julie Koerber 
Kathy Jones 
Katie Sims <------You are here 
Stacy Morgan 
Tosha Leyendekker

Supplies: Ink-Memento's Rich Cocoa, Versafine's Smokey Gray, Ranger Iced Spruce Distress Ink, PTI's Chai and Chamomile distress inks;  Paper-PTI's Rustic White card stock, patterned paper from Authentique's  "Nestled" 6x6 paper pad; Other-sheer white ribbon, Stampin' Up! Spritzer tool with Sahara Sand and Basic Gray markers, We R Memory Keepers Corner Chomper, Gelly Roll Clear Star pen, Wink of Stella clear brush pen, Atyou Spica Gold glitter pen, Ranger Glossy Accents, White Prismacolor pencil and these Copic colors:  YG61, YG63, YG67, BG72, BG90, BG93, BG96, BV0000, BV01, BV08, BV29, BV34, B23, Y13, Y15, Y26, W0, W2, C0, C3, and C6.


**As I mentioned at the beginning of this post, there is an extra little surprise for you!  Marcella has decided to have a little sale...just take a look at this....


And here are the deets from the Bloom Whisperer, herself...:)


Grateful For You - Two Special Offers:


Buy ANY 4 clear stamps and get the 5th clear set free! Enter discount code: INTHECLEAR at checkout
- OR - 
Buy ANY 5 digital sets and get the 6th one free! Enter discount code: DIGILOVE at checkout

These promotions are good on all in-stock stamp sets at PowerPoppy.com. Promotions cannot be combined in the same transaction. However, customers can complete one transaction for clear stamps, and one transaction for digital stamps if they would like to take advantage of both specials.
Offer ends Monday, October 25 at midnight central.

How about that?!  You know, you could get some great Christmas shopping done for the crafters on your list....or, for yourself!  :)  So happy shopping!  Until next time, take care!

~Katie

Wednesday, October 19, 2016

Power Poppy's October Stamp Release~Day 4


Hi there and welcome back!  I am so glad you could pop back by today as we celebrate Day 4 of Power Poppy's Happiest Holiday stamp release.  I hope you have enjoyed the week so far, but let me tell you....there is so much more good stuff for you to see!  Today's set, Fully Stocked, is a darling collection of stockings.  Take a lookie....


Sound good so far?  I'll bet you will catch a glimpse of all three of these adorable stockings along the hop today.  For my card, I chose to use the gardener themed stocking.  It is chock full of garden markers, tools, a journal, and some branches of mistletoe.


I started by stamping my image with Memento's Tuxedo Black ink on to white card stock and colored it up with Copics.  Next I used a stitched die to cut my image panel out and sponged some ink around.  I used a couple of die cut ovals in green card stock to layer behind my image panel.  To finish off the image I used some Ranger Glossy Accents and a Wink of Stella Clear Brush pen.  While letting that dry, I stitched some patterned paper on a wood embossed panel, stamped my sentiment and mistletoe image, sponged some distress ink around, added a button and some ribbon and then adhered it to my card base.  To finish my card I cut a little notch out of my image panel so it could fit snugly against my bow, adhered it to my card with foam dimensionals and rounded the top corners of the card.  The finished card size is 3 3/4" x 5 1/4".


Is that not the perfect stocking for a gardener?  Oh, the possibilities for these images are endless!  Just wait til you see the other two stockings.....eeeeeeeep, they are precious! :)  And, there are a few other sweet little detail stamps in this set....you'll love them all, I promise!  

So that is all for my card today, but make sure you check out all of the gorgeousness from my awesome Bloomie sisters and leave them a little blog love while you are there.  I will be joining up with everyone on Friday for the Power Poppy hop showcasing all of the stamp sets.  Hope you can stop back by then.  If you haven't already, make sure you stop by the Power Poppy blog to see all of the release festivities!  So glad you were able to visit today and until next time, take care!


Cindy Lawrence      
Katie Sims <------You are here 
Stacy Morgan 
Tosha Leyendekker
and Marcella Hawley

~Katie

Supplies not listed above:  Paper-Rustic White card stock from Papertrey Ink, patterned paper from Simple Stories' "Handmade Holiday" 6x6 paper pad; Ink- Ranger Distress Ink in Antique Linen, Stampin' Up!'s Mellow Moss ink, PTI's Smokey Shadow, Chai and Chamomile inks; Other-We R Memory Keepers corner chomperMy Favorite Things Cross Stitch Oval Die namics set, Spellbinders Deckled Edge Classic Ovals Large die set, woodgrain impression plate, ribbon and button-all from PTI, twine, and these Copic colors-C0, C3, C5, C7, E02, E19, E40, E42, E43, E44, E47, E49, E50, E51, E53, E55, E57, E59, E93, E95, E97, E99, G29, G40, G43, G46, YG61, YG63, YG67, YG91, R11, R12, R14, R17, and R29.

Monday, October 17, 2016

Power Poppy's October Stamp Release~Day 2

Hi there and a Happy Monday to you!  Welcome back for Day 2 of Power Poppy's Happiest Holiday stamp release.  I hope you are enjoying the release so far.  Today's set is as darling as can be....Action Santa is sure to bring a smile to your face....


Now how cute is he?  I mean really....Santa on a Scooter?!  Who thinks of that?  Marcella does, that's who and lookie...she even personalized his scooter!  As darling as this is, I couldn't help but think that maybe Santa might miss his ol' pal Rudolph and that got me to thinking some more....and before I knew it, I was customizing Santa's scooter a bit more....

That's the beauty of stamps ....you can color your image up any ol' way you want to...so a Rudolph scooter it is!  ;)  I stamped my image and colored it up with Copics...lots of 'em....really, two big fist fulls!  I'll list them below.  :)  Next, I added some sparkle with my Gelly Roll clear glitter pen and my Wink of Stella Clear brush pen.  My sentiment, also from this set, was stamped with Versamark ink and heat embossed with white embossing poweder.  Next, I die cut out my sentiment banner and all of my card layers then added some stitching and assembled everything together.  Lastly, I added some Ranger Glossy Accents to the red headlight and let it dry.  The finished card size is 4 3/4" square.


My tree actually ran off the side of my die cut so I just stamped the image again, colored up the tree portion I needed, fussy cut it out and adhered it to my image.  The scallop square is actually a Papertrey Ink tag die so the ribbon was easy to tie to the tag.  Mercy, how I love this precious little elf!  He looks quite intent on zoomin' down the mountainside, doesn't he?  I can't tell you how many times I giggled while coloring this up....it is a super fun image!  

So, that is all for my card but you know my Bloomie sisters are bringin' it so make sure you check out all of the creative ways these talented ladies made Santa zoom (or whoosh!)...and leave a little blog love while you are there. ;)  I am so glad you were able to stop back by today.  I will be joining back up with the hop again on Wednesday and I hope to see you then....until then, take care!  

Cindy Lawrence    
Julie Koerber  
Katie Sims <------You are here 
Stacy Morgan 
Tosha Leyendekker
and Marcella Hawley

~Katie

Supplies not listed above:  Paper- Echo Park's "I Love Christmas" 6x6 paper pad, Smokey Shadow card stock and vellum from Papertrey Ink, Classic White card stock from Flourishes; Ink-Memento's Tuxedo Black, Papertrey Ink's Fresh Snow; Dies- Papertrey Ink's Tag Sale Quilted die, Spellbinders Lacey Pennants die set and Grand Nestabilities Square die set; Other- ribbon and button from PTI, twine, and these Copic colors: B00, B000, B0000, BG01, C1, C4, C9, E0000, E01, E11, E40, E42, E50, E53, E55, E57, E59, R20, R22, R24, R27, R29, R59, W0, Woo, W2, W4, Y18, Y32, YG11, YG13, YG17, YG61, YG63, and YG67.

Sunday, October 16, 2016

Power Poppy's October Stamp Release~Day 1


Hello, hello, hello and welcome!  I hope this day finds you well!  Things have been a tad busy behind the scenes at Power Poppy HQ lately.....have you seen all of the sneaks and the incredible new digital release ~Chickadee in Barberry~ that the amazing Instant Gardeners introduced on the blog yesterday?  Oh, the lovely cards you will see (if you haven't already)....seriously, you must check it all out!  :)

Today marks Day 1 of Power Poppy's October stamp release....hold on to your seats, because all of these new sets are quite amazing.  Marcella has been hard at work sketching her little heart out for our benefit.  I know you are going to love them all, but let me show you today's sweet little set, Simple Joys......


For my card, I chose to use the darling watering can image.  I am tempted to recreate this little scene at Christmas with an old watering can I have from my grandmother.  If I do, I will take pictures and report back....promise! ;)  So, I started by die cutting a white card stock panel, stamping my image and sentiment and coloring my image with Copics.  I added some shimmer with my Wink of Stella clear brush pen .  Next,  I sponged on some antiquing ink, sewed a strip of gingham paper across the bottom of my panel, and added Ranger Glossy Accents to the ornaments and set it aside to dry. Then, I assembled my card base from Kraft card stock and cut a second Kraft panel to have something to attach all of my layer to before adhering to my card base.  I stitched some patterned paper to the Kraft panel and adhered it to my card base.  Finally, I tied a ribbon around my image panel and adhered it to my card.  My finished card size is 3 1/2" x 5 1/2".


I love, l-o-v-e, love this image and the fonts on this sentiment!  This one has a vintage distressed appearance that just makes me so very happy.  I can't wait to color this image up again using all different colors for the ornaments! There are so many possibilities for this image alone, not to mention all of the other goodies that come along with this set....I'm sure you'll get a peek at several of them along the hop today.


Yep, still crushin' on this sweet image....how about you?  Ready to add this set to your collection?  This set and all of the upcoming sets in this release will be available in the Power Poppy store on October 21st....so mark your calendar!  ;)  That is all for my little card today but please make sure you check out what all of my amazingly talented and super sweet Bloomie sisters have created for your inspiration....I have seen some of their creations already, and let me tell you....you are definitely in for a real treat!  Also, I would love it if you could stop back by tomorrow for Day 2 of our release....I can't wait for you to see this darling set!  Until then, take care!

Cindy Lawrence    
Julie Koerber  
Katie Sims <------You are here 
Stacy Morgan 
Tosha Leyendekker
and Marcella Hawley

~Katie

Supplies not listed above:  Paper-Rustic White and Kraft card stocks from Papertrey Ink, patterned papers from My Minds Eye's "Sleigh Bells Ring" 6x6 paper pad and Simple Stories' "25 Days of Christmas" 6x6 paper pad; Ink-Memento's Rich Cocoa ink, Versafine's Crimson Red ink, PTI's Chai and Chamomile distress inks, Ranger Distress inks in Antique Linen and Frayed Burlap; Dies-Spellbinder's A2 Matting Basics B die set; Other- PTI twill ribbon in "Fine Linen", Atyou Spica clear pen, and these Copic colors: C3, C4, E02, E08, E09, E31, E34, E40, E43, E44, E47, E50, E51, E53, E55, E57, and R27.

Friday, October 7, 2016

Happy Friday with a New Power & Spark Challenge!


Hi there and Happy Friday to you!  I am so glad you could stop by for a visit.  Today is the beginning of the newest Power & Spark Challenge on the Power Poppy blog.  Our hostess this month is the incredibly talented, amazingly creative, and super sweet Allison Cope!  She has really thrown down quite the challenge....just take a lookie.....


Want your cards to jump, jive, move & groove? Well, you're in luck! For this month's Power & Spark Challenge, Ally Cope is encouraging us all to do just that! Here's what this creative phenom had to say.....

"For this month, we want to see You Move It, Move It!  That is, we want to see an element of your card move.  It could be anything from a pull-out tag, to some sequins in a shaker card to a fun element that jiggles all on its own!  Let's see you Move It!"

Woo Hoo, Ally! What a great challenge!  Ok, so let me show you what I created...


I decided to use this darling image and sentiment from the Frosted Gingerbread set.  I knew I wanted to do a shaker card for my "move it" component but then I decided to add a little something extra that you will see in just a bit.

I stamped my image on to Rustic White card stock from Papertrey Ink and colored it up with Copics.  I added shimmer and shine a few ways....with Ranger Stickles, an Atyou Spica Silver pen, and Ranger Glossy Accents.  While all of that dried, I used several dies to cut layers to build up my shaker part.  I used two scallop circles that I layered and offset to give it more dimension, then added a circle die cut from patterned papers and stitching.  I added a little additional curve to my sentiment before stamping it by putting one of the circle dies down on an acrylic block, shaping my sentiment stamp against the curve of the die with the stamping surface down on the acrylic and picked it up with another acrylic block....tada...instant perfectly shaped sentiment for my die cut!  I fussy cut my gingerbread house and adhered it to the patterned paper circle then die cut a circular frame and attached my clear sheet.  I used two layers of foam tape to build up the sides of my shaker added a mix of beads, glitter, and sequins and assembled it all together.

My card base is made using my dream die set from Marianne Design, Anja's Squares.  I only allow myself to use it every now and then or else I would use it all. the. time....:) 


I added a little rope trim around my circle to hide the foam tape and give it a more finished edge.  Now, for the little surprise part of my card...the circle shaker assembly is actually mounted on to my card with magnets so it is removable!  Here is a little photo of just the shaker on my refrigerator....


Well.....Ally said "Move it, move it", so that is what I did!  :)  I moved it right on to the 'fridge!  :)  So that is all for my little card today but lemme tell you....those Bloomie sisters of mine have really got a show in store for you!  Make sure you check out all of their beautiful creations and leave them a little blog love while you are there.....then, why don't you play along with us this month?  Get movin' on your own "Move It" creation and link it up to the Power Poppy blog for a chance to win a prize!  Yay!  

Thanks so much for stopping by today....it's always so good to see you!  

Oh, did you happen to notice the new little blog graphic announcing the upcoming Power Poppy stamp release?  Yes, indeedy.....new stamps will be available in a couple of weeks and I can not wait for you to see all of the gorgeous new images Marcella has for us!  Truly, you are just going to l-o-v-e them!  :)  Ok, until next time.....take care!

Cindy Lawrence    
Julie Koerber  
Katie Sims <------You are here 
Stacy Morgan 
Tosha Leyendekker

~Katie

Supplies not listed above:  Paper- Kraft card stock from Papertrey Ink, patterned papers from My Mind's Eye's "Merry" 6x6 paper pad; Ink-PTI's Smokey Shadow and Fresh Snow, Memento's Tuxedo Black; Dies- Spellbinder's Standard Circles Large set and Classic Scalloped Circles Large set; Other-assorted glass beads, glitter and sequins, magnets all from Michael's;  Copic colors:  R20, R22, R24, R81, R83, R85, YG21, YG23, YG25, YG95, BG0000, BG000, BG01, BG53, BG57, E40, E50, E51, E53, E55, E57, YR12, YR14, YR61, and C3.